Friday, October 29, 2021

King Kong - in memory of Mike O

This post is to commemorate the passing of a friend: someone who inspired me and had a strong influence over me in these past two years.

If you are interested in wargaming or historical miniatures, you may have heard of Mike O, aka "Mike O Durruti." Perhaps you have seen his thoughtful and well-researched posts on historical message boards. This is how I came to know Mike. Mike had a deep knowledge of the Spanish Civil War, and in particular the efforts of the anarchists and the Durruti Column in that conflict. When I first became interested in this hobby a few short years ago, I found Mike's work online and became deeply inspired. We connected on a message board, and developed a friendship based around our historical interests, but also music, art, politics, tv and the news. We were soon emailing and calling each other, and had a great time trading perspectives on current events from across the Atlantic, and, of course, comparing our accents. My older daughter particularly enjoyed joining in for that last part.

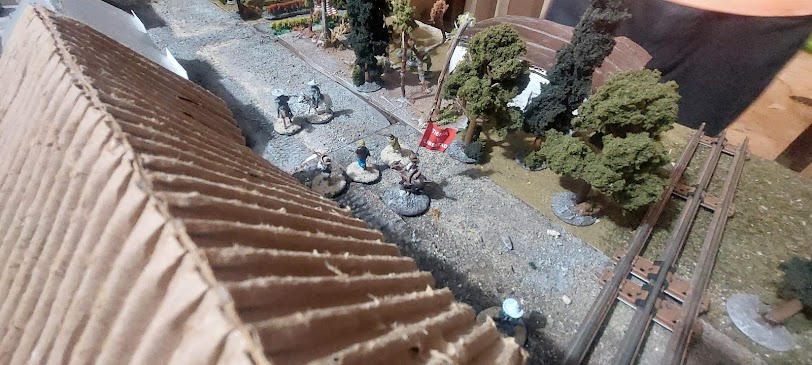
Mike and I really bonded around our obsessive interests in anarchist workers and peasants who fought in the Spanish and Ukrainian revolutions. During this period of my life where I have been feverishly creating miniature representations of those particular revolutionaries, Mike's immense knowledge, passion, and attention to detail were invaluable to me. He introduced me to many sources, photos, people, ideas, and techniques, that I otherwise may never have learned about. In my lifetime spent studying the minutia of anarchist revolutions, I had found someone, in Mike, who had spent many more years on the same pursuit, who I could look up to as an elder, who could push me to look deeper. He never held back in sharing his wisdom, and was always eager to learn what I had to share as well, and to encourage me forward in my way-too-many ongoing projects.

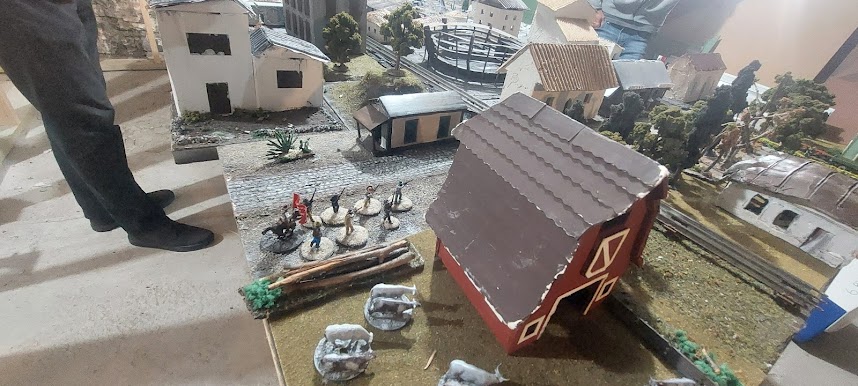
Mike passed away a couple weeks ago. To remember my friend and honor his contributions to the historical memory of those who fought for freedom and equality, I'd like to share the last project we worked on together: a 1/72 model of King Kong.

Through my local library, I had the opportunity last winter to learn 3D design and printing, and to produce a few small items. In our work in previous years to discover as many of the tiznaos (improvised armored vehicles produced by Spanish workers during the revolution) used by the Durruti Column, Mike had lamented the lack of an accurate, available model of the famous King Kong. I had made a crude model of it once out of a toy truck and some clay, but with the opportunity to use the 3D printer, I set off working on the below model.

Mike was instrumental in the process. We began discussing the project back in February. Mike shared with me rare photos of King Kong I had not seen, helped me figure out accurate scale and dimensions, shared his thoughts on the various shape and surfaces, and helped me decipher the rear doors on the truck from the old, grainy photos. The shape of the truck, Mike argued, is where past modelers had gone wrong. Informed by the rare photo from the rear, as well as his keen eye, Mike helped me edit and reedit. When Mike was satisfied with the accuracy of the 3d design, I knew it was ready.

Mike suggested a swiveling turret and helped me figure out how to make it work, and when the model printed out a little funky, gave me suggestions for smoothing over the rough sides.

His last email to me about the project came in mid July, a few days before the anniversary of the Spanish Revolution. That's about how far I had gotten with the models. They have been sitting on my desk since the middle of summer. When I heard that Mike passed on, I started working on them again.

So in memory of my friend Mike, I present our latest efforts:

King Kong, 3D printed Model.
Tinkercad file - (Print your own copies or use the file to make something new.)

Here's what it looks like in Tinkercad:


I printed 3 models. This is what they looked like when they came out of the printer (the third I shipped to Mike in England). Note how one has a separate turret, the other is one piece.


The print had a couple flaws. In particular, the smaller pieces did not come out at all, such as the gun on the turret and on one of the models, the lower back step is missing. I used a tiny drill bit to drill out holes to insert new guns, and to connect the turret to the hull.


The sides also printed a little bit rough, with many grooves, especially on the left side. Mike suggested filling them with a slow-dry putty and then sanding them smooth.


I attempted the putty work, made the guns out of small pieces of wire glued together, and added flag poles from the same wire. Then, I spray painted the models base brown.


Unfortunately, the groves on the left sides are still visible. I didn't use enough putty. I hoped they would fill in a little more with multiple layers paint.


Next, I painted the models gray, first a darker shade, then a slightly lighter shade on top.


Unfortunately, the groves are still visible, even with 2 coats of thick gray paint, but it got a little better with each coat.


Having two photos of King Kong with slightly different markings, I decided to paint one from each photo. The first model, with the swiveling turret, I decided to paint from the photo which I believe was the earlier photo. This is the model I plan to use when I play games.


Here is the first model, close to done:


While I didn't have a photo of the right side of the vehicle, given what was painted on the left side I could safely assume the right side would have looked something like this:


Next, I painted the model with the fixed turret from the second photo, which had more (and more complicated) markings. This one will probably end up on my bookshelf.


Here's a few photos of the two of them together. 


I added a third layer of gray over parts of the rough section, improving it yet again, but still it isn't perfect. Such is life, right?

I have one final step, which is adding the red and black flags to the flag poles. When I was searching for images last night to help me paint these markings, I was going through Mike's emails. I came upon a message in which he mentioned his preference for flags which have folds and shadows in the image itself. He sent me this red and black flag he had found as an example:


So my final step, which I will have to complete another day, will be to print out the flags and attach them to the poles.

One last touch I added to the model I intend to use frequently in gaming: I mentioned before Mike had found a photo of the back of the truck. I could not find that photo when I was looking through my emails and WhatsApp messages, so I have no idea what was actually painted on the back of King Kong. Instead, I wrote my own little tribute to my friend, to remember him by whenever the Durruti Column rolls onto my gaming table.


With Mike gone, I am left feeling overwhelmed and a little more isolated. Very few people share such specific interests with such passion, and I feel lucky that I got to know him. I wish we had been in closer touch recently, and I can't help but lament all of the projects we never got to start together. Most of our friendship occurred during a global pandemic. We never got to meet in person, but we had talked about going to Spain together one day, walking through the streets of Barcelona and following the path of the Durruti Column into Aragon.

I heard less and less from Mike at the end of summer and into the fall, and I have no knowledge about my friend's final days or how he passed. Perhaps thats better, as much of Mike's life outside of our shared interests are a mystery to me. But I can't help but think of the final words of Kim Chwa-chin, a Korean anarchist who help create a revolutionary territory in Manchuria, who said, after suffering a fatal wound from an assassin:  “What to do… I have to die at this time with so much work to do. How regrettable...”

Rest in power, Mike!

Thursday, October 7, 2021

AAR - Scenario 1 - The Liberation of Mexicali

I'm planning to release all of these Suneos de Libertad scenarios in a large PDF, and release the rules as a second PDF, hopefully early next year. However, before doing so, I wanted to test out the rules and some scenarios on real humans. My friends Chris and John were kind enough to play guinea pigs last weekend. We started with the first scenario: The Liberation of Mexicali.

As described in the link above, this scenario attempts to recreate the first action of the Baja California campaign undertaken by the PLM at the end of January, 1911. Mexicali, little more than a workers' colony for the Colorado River Land Company at the time, was pressed right up against the US border (the green, grassy area on the right edge of the table is the US.)


The Alamo Canal ran south of the town, and below that, only Little's Ranch stood out in the the desert.


John got to play as the rebels, who approached the town in three small forces. The PLM had scouted Mexicali earlier. Given the tiny garrison, PLM's Organizing Board determined it'd be best to strike quietly and quickly with a small force, and to assemble a new Baja California Division in the town after its liberation. Below are John's three small groups.


The scouting efforts had been largely successful. Though one PLM operative was captured and jailed in the town, the region's governor could not imagine the anarchists would launch a successful revolt, and so made no efforts to reinforce or fortify the town. The PLM, on the other hand, had selected three essential objectives. They learned that the subprefect resided in the house, bottom-right of the photo below, called "The Yellow House."


(The five Rurales officers standing in the town square above were "off-duty," and Chris hid them in houses scattered across town.) The second objective was the Customs House right on the main intersection and near the border. The Customs House held money the rebels needed to fund their revolution, and was guarded by only two officers.


The last objective was the town jail, a rectangular stone building on the south-east edge of Mexicali. A jailer and 10 officers (pictured below) guarded the jail, though remained inside until they were alerted to the attack.


Chris's only other forces were two patrolling Rurales, who rode up and down the main road running south from the border toward the bridge over the Alamo Canal.


Mini Makhno and Tiny Durruti surveyed the battle field before the attack began. 


It was pitch black, and a cold snow fell on the desert as John successfully rolled to bring his first group onto the table. They entered on the northeastern edge, at a farm on the US side of the border. Their target was the Customs House, but given the conditions, they could only see 10" (at our 1/72 scale) in front of them.


The second rebel group came down from the mountain south-west of town. They marched toward the "Yellow House" to attempt to capture the subprefect.


John's final group appeared south-east of town, headed to free their comrades and fellow workers in the jail.


Chris, who's forces had not been alerted to the attack, could do little but watch John move his groups toward their objectives.


Only the mounted patrolmen were awake in the cold night, and they rode into the town square as their unseen enemies circled around them.


The first rebel group vaulted a log wall and they were on Mexican soil.


The second group descended from the mountain and marched slowly toward the canal.


The third group crossed the canal and attempted to approach the jail from the east, trying to avoid the doors so as not to be seen by the jail's garrison. The jail had no windows.


In general, John moved his attackers at a walk so as to make as little sound as possible. Once the defenders were alerted, the element of surprise would be lost to the rebels.


As John's third group approached the bridge over the Alamo Canal, Chris's patrol rode steadily south. It seemed the confrontation was imminent.


On the next turn, however, the rebels rushed off the road and entered the canal bed, on the way to the Yellow House, avoiding detection.


Down the canal road to the east, the second rebel group vaulted the stone wall around the jail. They prepared to set fire to the jail's doors. The garrison had still not been alerted, as my rules have no specification for footsteps alerting unsuspecting defenders (yet, more on this below).


On the north edge of town, however, the battle was about to ignite. At the start of Round Three, the first PLM group waked right up to the Customs House. John won the initiative roll, and his rebels wasted the poor customs guards before they could draw their weapons.


The shooting alerted the US border guards, who ran out to see what was happening. Without orders to cross the border, they could only watch helplessly. 


One sleeping, off-duty Rurale, however, was in earshot of the gunfire. He grabbed his carbine and rushed out onto the street. Seeing rebels attacking the Customs House, he fired, shooting one rebel in the back.


Meanwhile, down at the jail, a second skirmish unfolded. The rebels used their action turn attempting to light to jail's wooden doors on fire. Instead of attempting to start the fires one player at a time, John rolled for everyone to light their matches. They succeeded in starting the fire, but when the jail's garrison heard the commotion and rushed outside, the rebels had all already acted for the turn and were caught defenseless. Chris's Rurales mercilessly obliterated the entire second rebel group.


The patrolmen in the town square heard the gunfire ringing out in the night, and turned to race toward the customs house. Off-duty officers came out of the Yellow House and the two-story house next to it, pausing to get their bearings.


When the mounted officers arrived at the border at the beginning of Round Four, two rebels had already run inside the customs house. The four remaining PLM insurrectos stood in the road between the horsemen and the off-duty officer, his gun still smoking. 


John won the initiative roll, however, and made quick work of the officers. Joined by their two comrades, exiting the customs house with the revenue chest, the first group headed south into the heart of town.


With the Customs House conquered by the rebels, and the jail firmly in the government's hands, the future of Mexicali was unclear. Chris worked to consolidate his forces. 


Chris pulled the two off-duty officers at his disposal into the courtyard of the "Yellow House," and set about defending the area around the jail with the bulk of his forces.


Just south of the "Yellow House," another off duty officer rushed out, only to fall into the hands of John's third group, who were still slowly making their way toward their objective. The rebels captured the hapless officer, and John set one of his figures to guard their prisoner.


With a group approaching from the north and another from the south, Chris decided to evacuate the Subprefect and abandon the "Yellow House." The leading political authority in town was the actual objective, not the building itself. Thus, Chris was wisely consolidating his forces toward a more easily-defendable position.


As the Subprefect and his escorts fled for their lives toward the jail, however, Chris mobilized a group of officers to march out and meet the rebels.


The subprefect and his two escorts were joined by another off-duty officer, and the four passed the bullring on the way across the square to the jail.


 It was now Round Five, and John's two remaining rebel squads headed to the "Yellow House," as they could not know that the subprefect had left.


They arrived at the start of Round six. Discovering their target had vanished, the remaining rebels regrouped into two even-sized forces to attack the jail. One of the rebels stole the subprefect's horse.


Meanwhile, the subprefect arrived at the jail. There, the doors had finished burning off, requiring Chris to leave 4 guards to defend the twelve inmates of the jail.


The remainder of Chris's Rurales reached the intersections south-east of the "Yellow House," where they met half of John's forces out in the open. Chris won the initiative and acted quickly. Two of the officers rushed into a nearby building, while the rest fired on the rebels, caught in the open.


The skirmish lasted a few more rounds, with both sides shooting at close range, and neither breaking to run. Ultimately, Chris's officers won the intersection, with four Rurales standing in the road and two more inside the house, and all the rebels dead. With only one group of rebels left, and a well-fortified objective left to capture, the situation looked bleak for the PLM.


John's last group, however, bravely charged ahead on turn 9. At this desperate moment, John won the initiative roll, fired two incredibly accurate shots into the house, killing both officers there, and then easily dispatching the rest of the Rurales in the road. 


Next, the surviving six rebels turned the corner to assault the jail, guarded by six Rurales protected by a stone wall.


John sent his two mounted rebels wide to the south, and moved on the jail. 


Chris won the roll for initiative for Round 11. It seemed that all hope was lost for the revolutionaries, caught again in the open. But every single Rural missed his mark at this crucial moment. The rebels returned fire, hitting all but two of the defenders. The surviving Rurales retreated inside the jail. They were now outnumbered severely by the prisoners inside. Rolling for a prison revolt, however, was unsuccessful, so the prisoners continued to cower even though the jail had no doors left. On turn 12, John's rebels reached the courtyard. The defenders fired through the open doors, killing one horseman, but the situation was hopeless.


On Turn 13, Chris won the roll again and killed one more rebel. But the jig was up. Three of the surviving four rebels ran into the jail, killing the last guard, freeing the prisoners, and capturing the subprefect. 


Chris graciously conceded defeat, and the battle drew to a close 

This was an enjoyable battle to watch/referee, one in which the outcome wasn't clear until the very end. Being the first test of these rules and scenarios played by two humans (as opposed to myself playing against a single-player mechanism), it was interesting to see how Chris and John interpreted the rules and used them to their advantage. I thought Chris showed some moments of strategic clarity, such as deciding to consolidate remaining forces at the jail. But ultimately, he was sabotaged by his poor rolling, allowing John to overcome early setbacks and accomplish the difficult task of capturing the jail. 

I mentioned to them after the game my surprise at how little attention both players paid to the buildings themselves, which offer 2 points against each firing roll as "Hard cover." They both complained that my rules had no mechanism for sleeping or unaware defenders to hear approaching attackers. We discussed the addition of an "Alert rule," wherein unsuspecting defenders can hear approaching footsteps and whispered voices at 3/4 the range of sight. For this scenario, for example, where the dark of night and the snow reduced visibility to 10", the defenders may have heard rebels that passed within 7.5" of their positions. In daytime/clear weather scenarios, however, a 40" visibility would mean a 30" Alert range, which won't do, so we'll have to think through this rule change a little more. Ultimately, this is likely the only scenario in the entire campaign where such a rule is necessary, as after the PLM liberated Mexicali, everyone knew the war was on, forces dug in or march on fortified towns, and there was little sneaking around or surprising anyone after that. However, such a rule addition is still warranted.

John and Chris also took issue with my Fire Starting rule, wherein each individual mini figure can start a fire, if they roll 3+ once to light the match, and then a second 3+ to light the fire. While I prefer my way, as anyone with a match can start a fire, and its fun to watch things burn..., my friends suggested fire-starting could be a whole-unit action, with bonuses for numbers of figures within each unit. Clearly, I have some editing to do!

Compared to both my solo play through and the actual historic event, this First Battle of Mexicali play-through was far bloodier. It was fun to watch, but John's four surviving rebels would have had a hard time defending the town! My rules do not allow for wounds: each hit tallied is a death. Thus, these games are usually bloodier than the historical engagements they are based on. However, as with many of the flaws in my rules, for me, the need for simplicity and brevity often outweighs other considerations.

We all had a great time drinking beer in the basement and enjoying a tense contest. We plan to give it another go in two weeks, skipping ahead to the next battle over this town: Scenario Four - The Defense of Mexicali. While we are not yet sure who will field which side, as John won this game, he will be awarded 15 additional recruits plus the roll of 1D6 to his forces.