Back in May, I posted a tutorial on the building of cheap cardboard models of Sam Bellamy's first commands, the Sloop Marianne and Sultana Gally. As part of my efforts to complete my ship-building project, I recently put the finishing touches on these two. I failed to keep up with my step-by-step photo documentation, but I described the process at the bottom of this post.
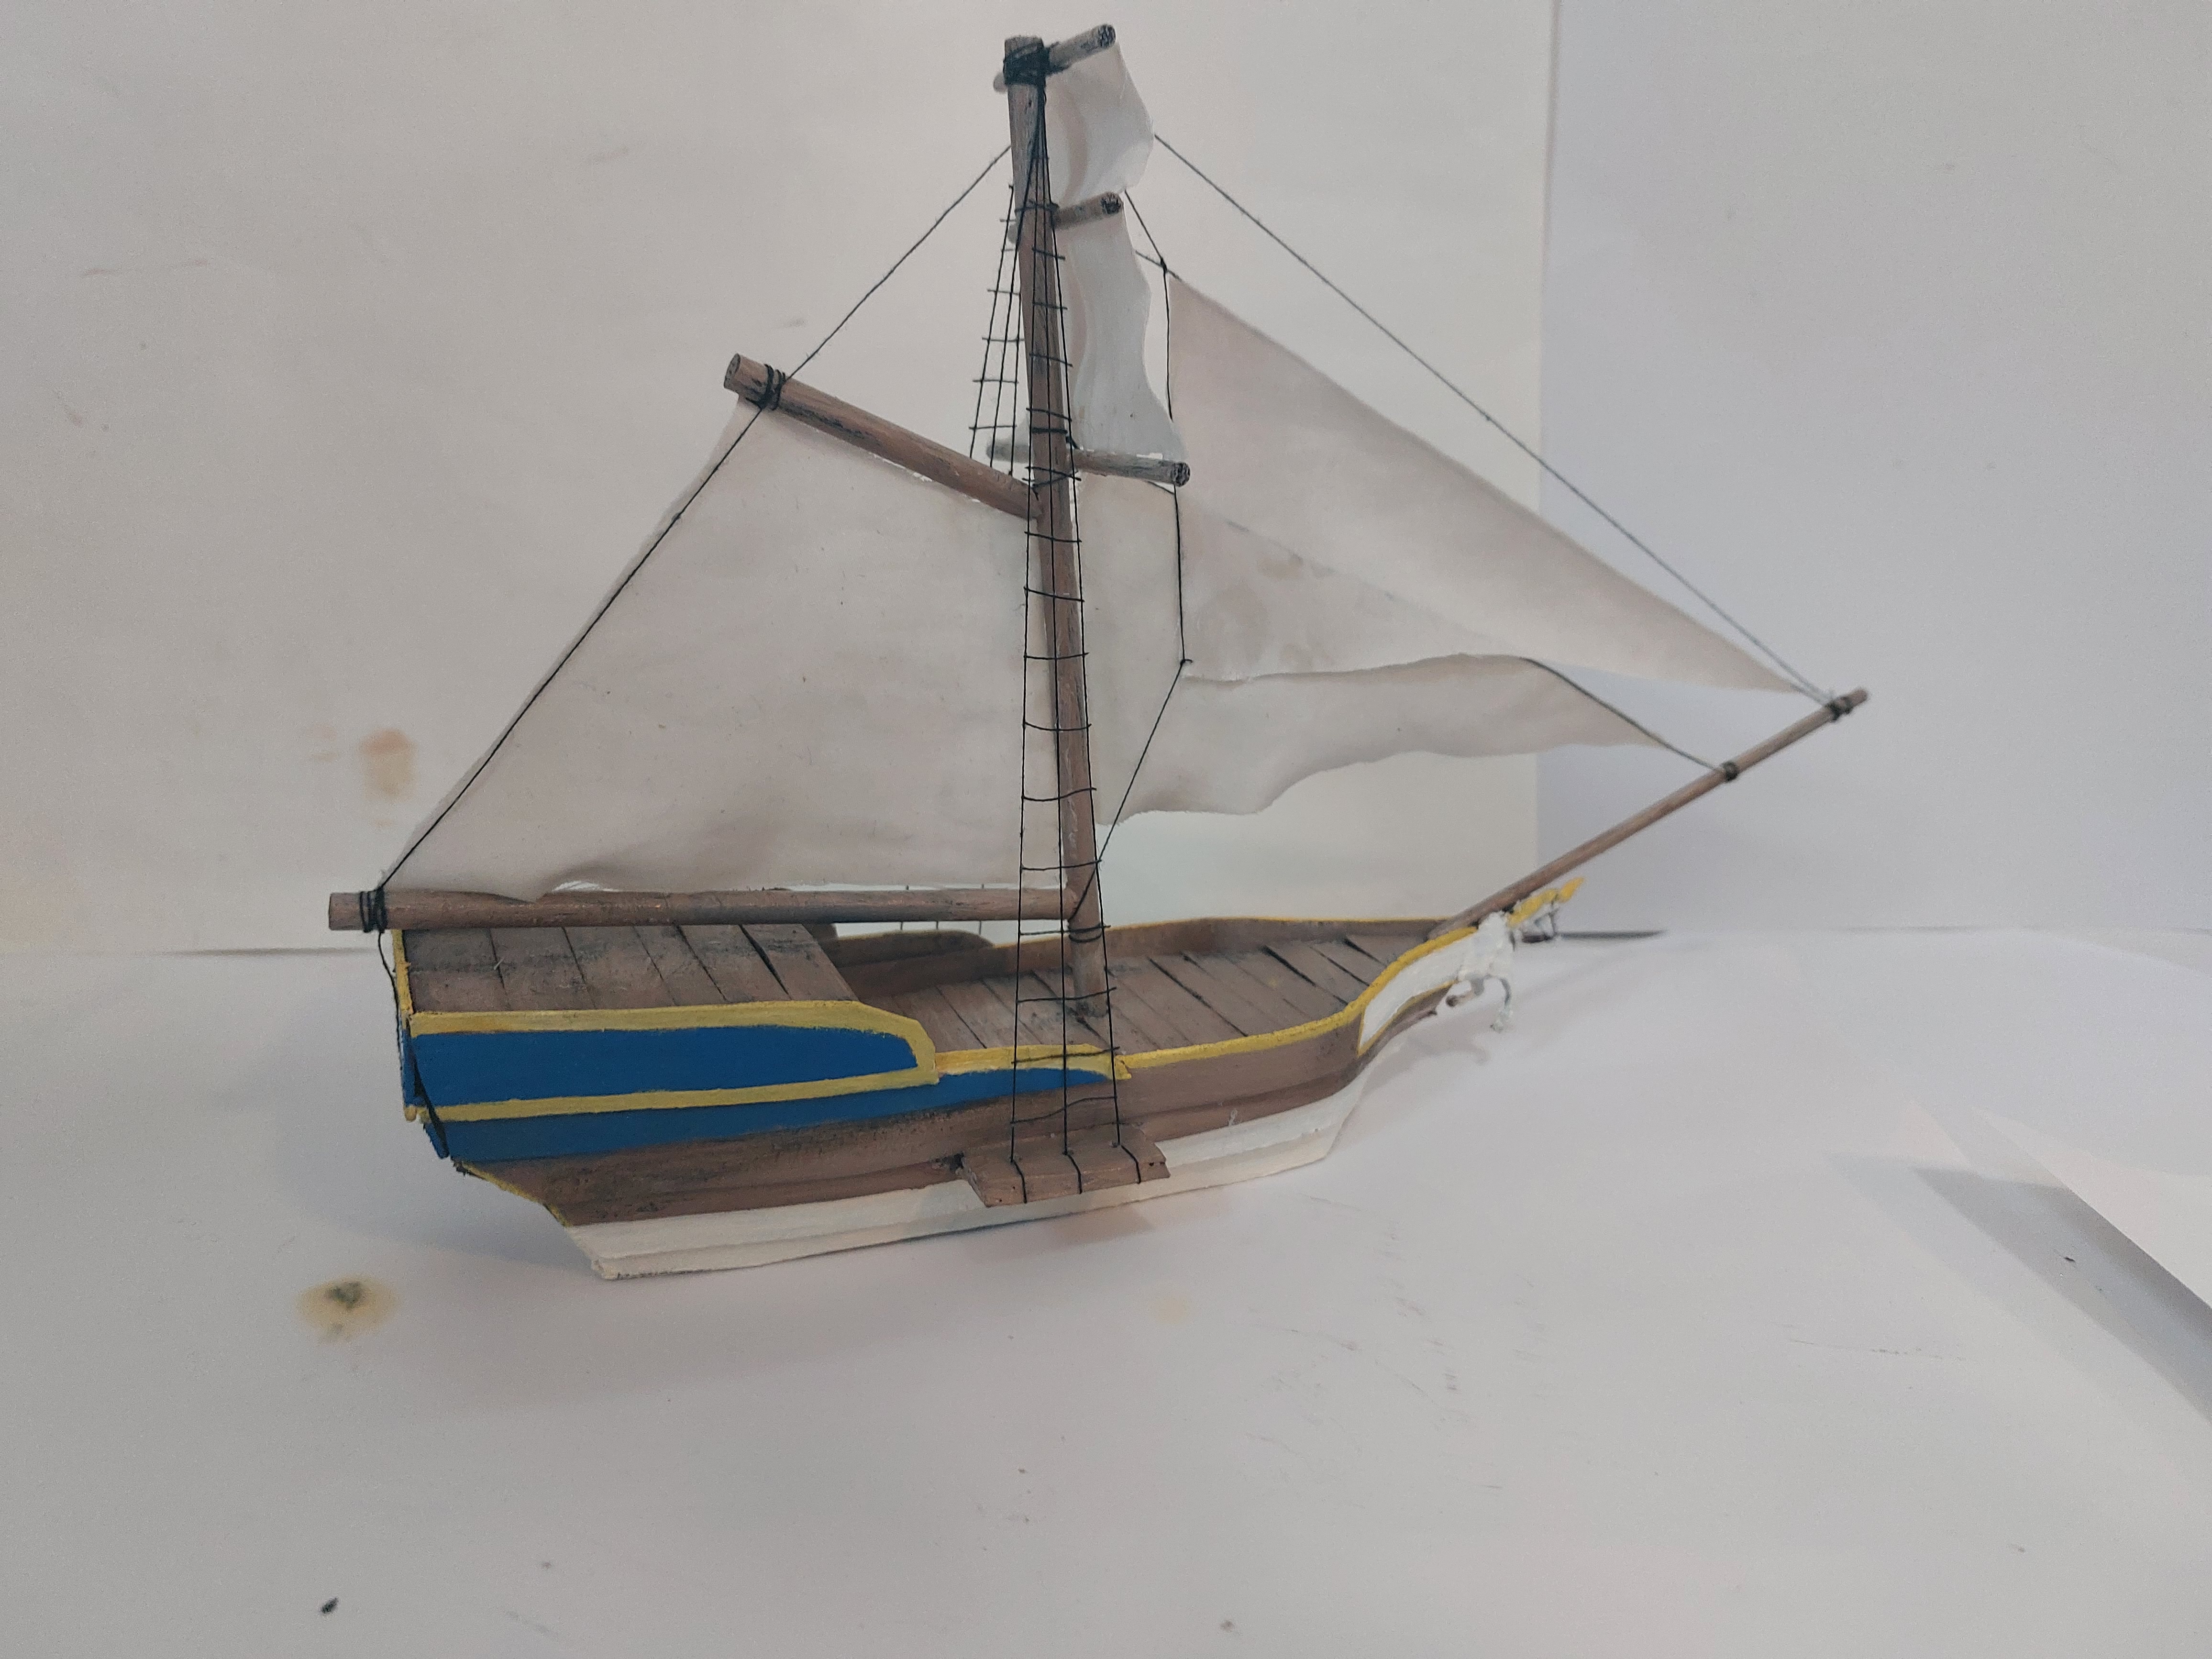
Here is the Marianne, the small French sloop that Benjamin Hornigold awarded to Bellamy, making him a captain for the first time.


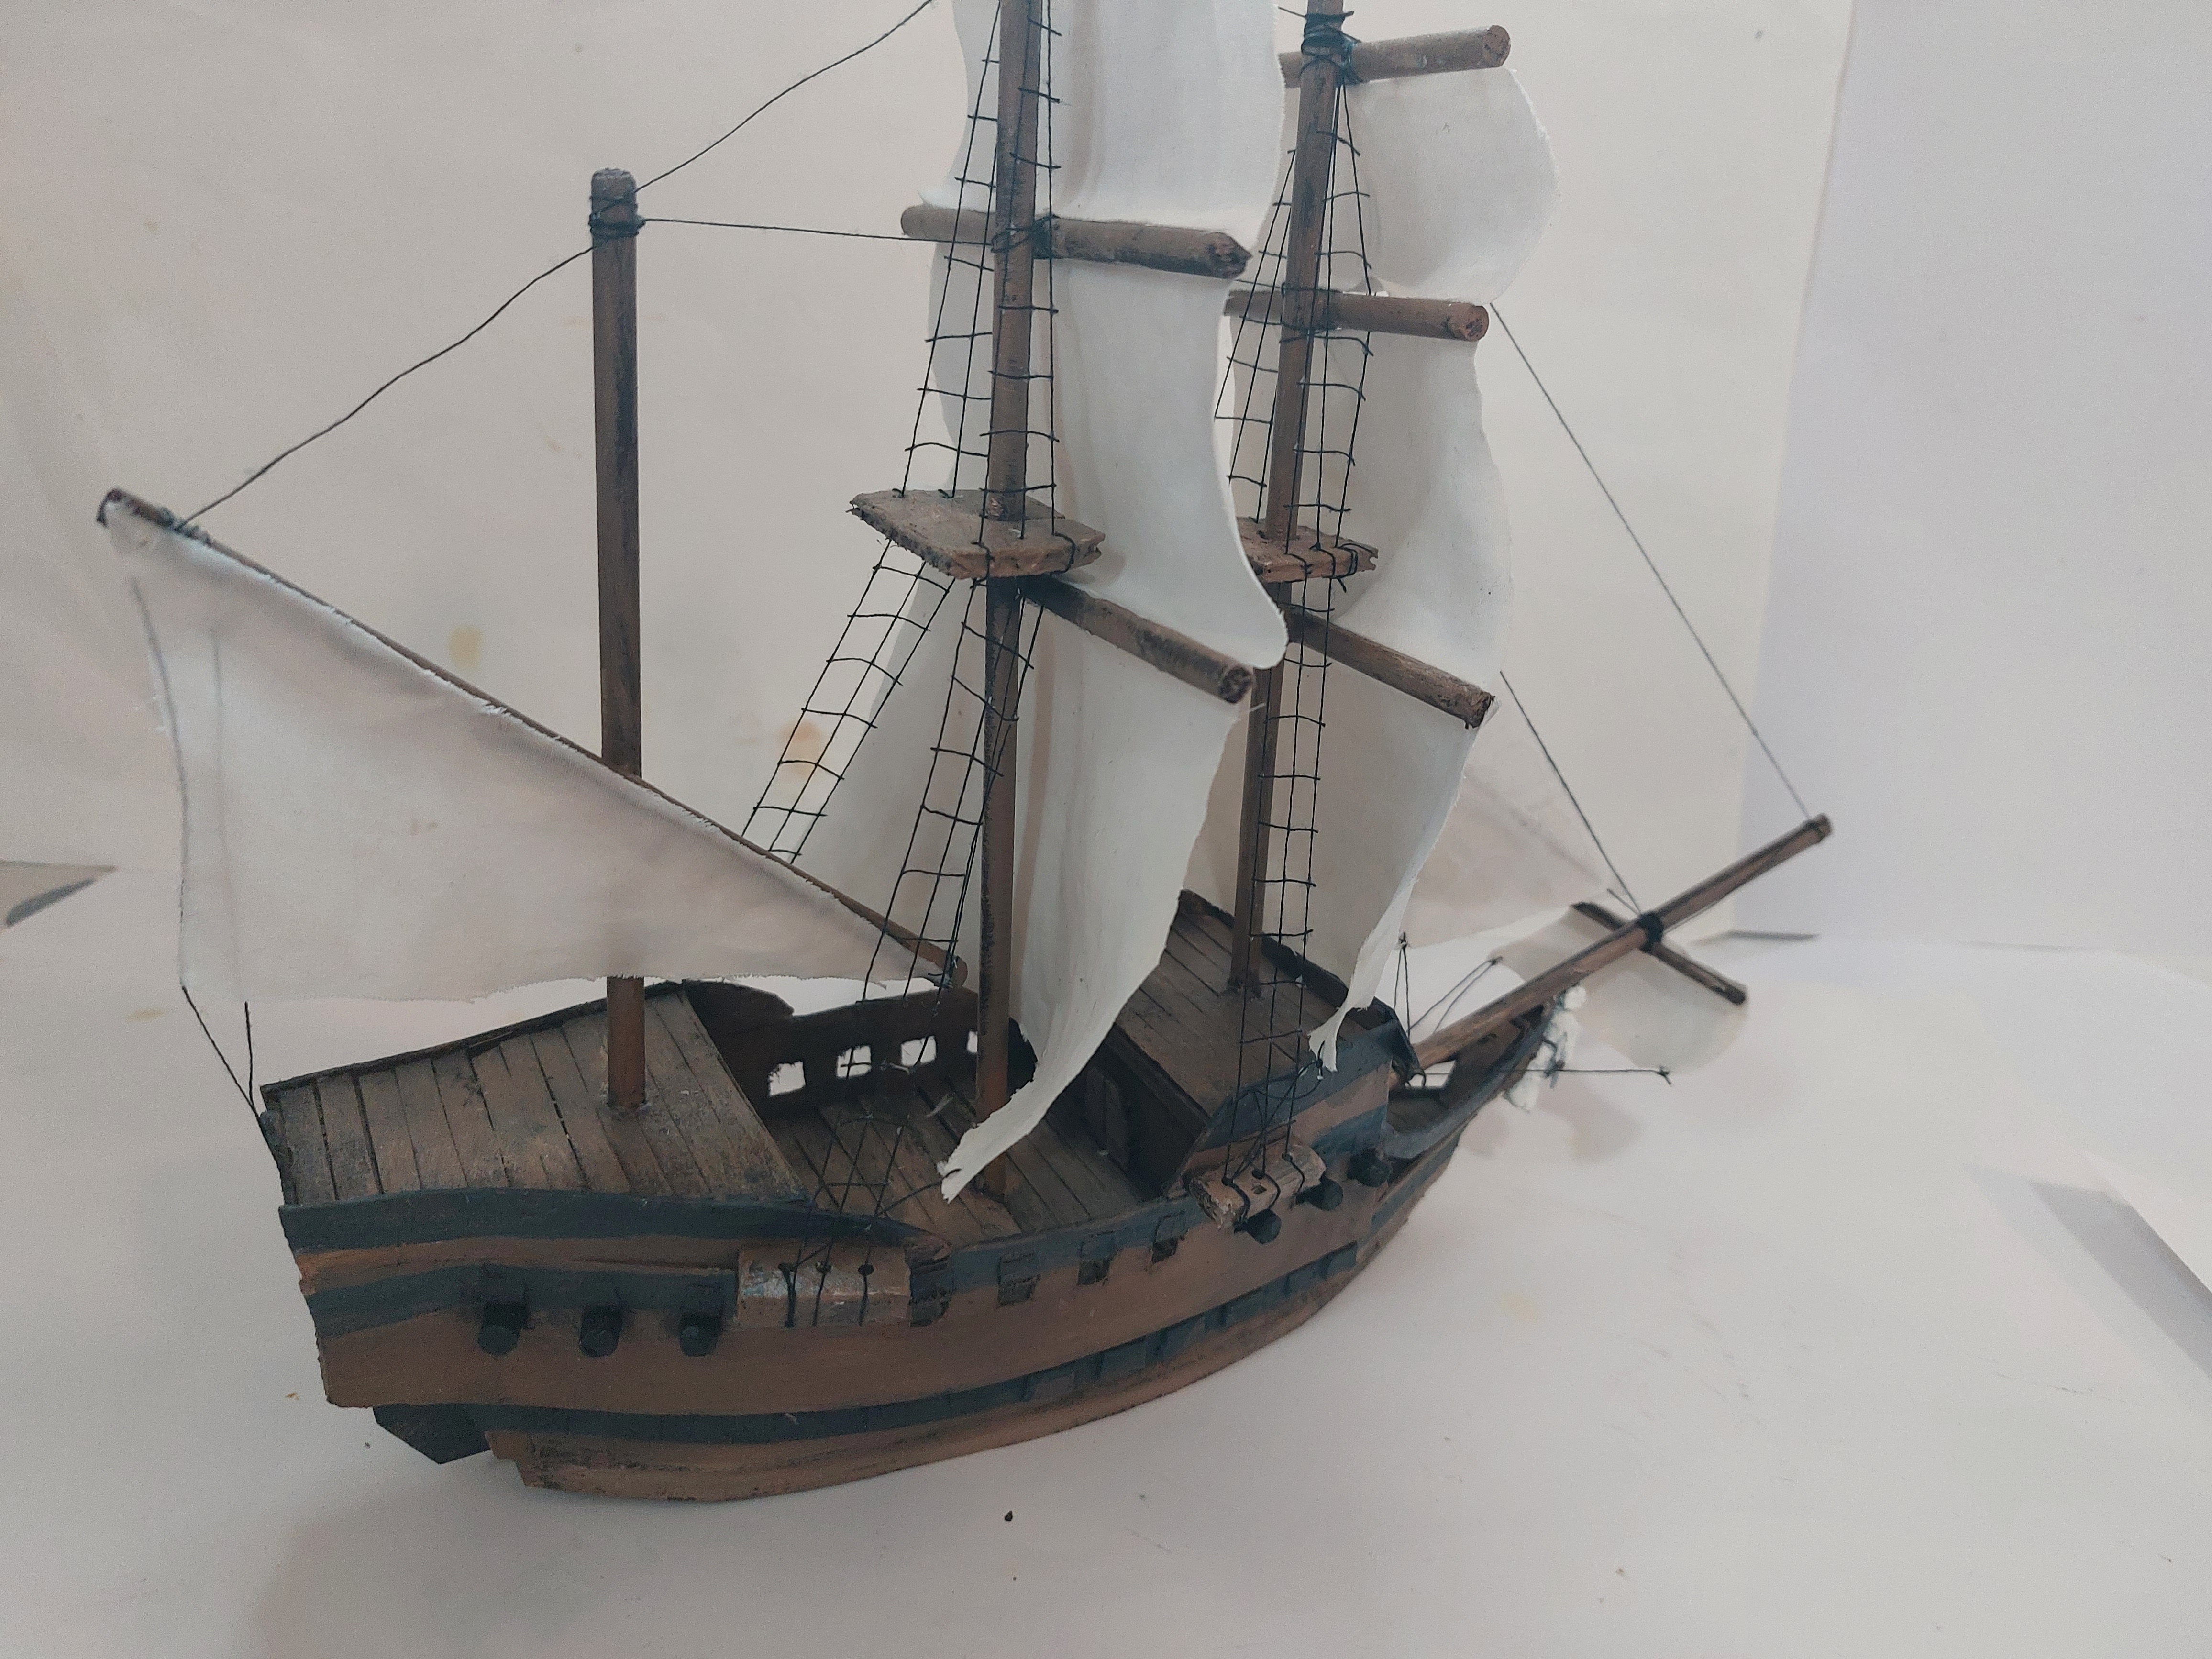
Next is the Sultana Gally, which Bellamy used, in consort with the Marianne, to capture many ships, including the Whydah:


Looking back on my previous post about these particular ships, I'm disappointed in myself that I didn't continue to take pictures of each step to finish off the fairly-detailed tutorial as I intended. I will do my best to describe the rest of the process below. My apologies, reader!
I had left off with the two model ships spray-primed dark brown. Using oil paints, I painted a couple layers of brown onto every surface of the ship, with darker layers first and brighter layers with a good deal of linseed oil last. Next, I painted details, using black for the cannons and stripes, and brighter colors for some of the trim, especially on the Marianne, and the figureheads. I very carefully painted the ship names on the sterns.
I left the paint dry for a few weeks, and began with the rigging. First, I build the shrouds and ratlines. Using a small needle and black thread, I began at the bottom. I had previously poked 3 holes in each of the channels and crows nests, and I tied a long piece of black thread to the furthest aft hole. I thread it up through the corresponding holes in the crows nest, where I made a second loop and tie. I continued the thread up over the top of the mast, tied it again, and threaded back down the next set of holes. I continued in this way, bringing shrouds up and down the masts until they were complete.
Next, I cut tiny bits of black thread for the rat lines, which I simply glued across the shrouds, as evenly-spaced as I could, to make the ladders. I found getting a small bit of watery glue on the ratlines and letting them dry made them easier to keep them straight and cut in fine detail.
Once the shrouds and ratlines were complete, I added more rigging to tie the masts together, and lines for the fore and aft sails to hang from, then I began on the sails. I carefully measured and cut the sails to the correct shapes, dipped them in watery glue and rung them out, then hung them from the yards using clamps. For the square sails that needed to be tied off to the yards and channels below them, I needled and knotted pieces of black thread through the bottom corners of the sails before the dip in gluey water. I hung these threads to yards or other objects behind the sails themselves, which helped hold the sails in positions which suggested they were full of wind. Once the sails were dried, I tied them off to the yards or channels below. I cut off all excess thread and these ships are ready to go.
No comments:
Post a Comment