Links to the Scenario and the AAR from Day One.
A week after our first day of battle, we resumed the fight for the military installations around the Ronda Colom. Unfortunately, Lee was unable to join us, but Chris fought stubbornly enough for the both of them.
Round Three began with Chris winning the roll for Round Initiative. During the Ranged Phase, he aimed his 75 mm cannon in the Ronda at the point of our attack on the southern end of the frontline. The shell landed in the intersection, killing two of the workers at the doorway of the Atarazanas, and pinning a third inside.
He aimed the other Nationalist artillery piece toward the same spot where Lee had flattened our Second Attack Group during the previous game day, hoping it would sail even further and take out our cannon in front of the theater. Instead, it landed inside the crater of the earlier shell, causing minor damage to the theater and repining the just-unpinned survivors of the Second Attack Group. Would they ever get off of the street?
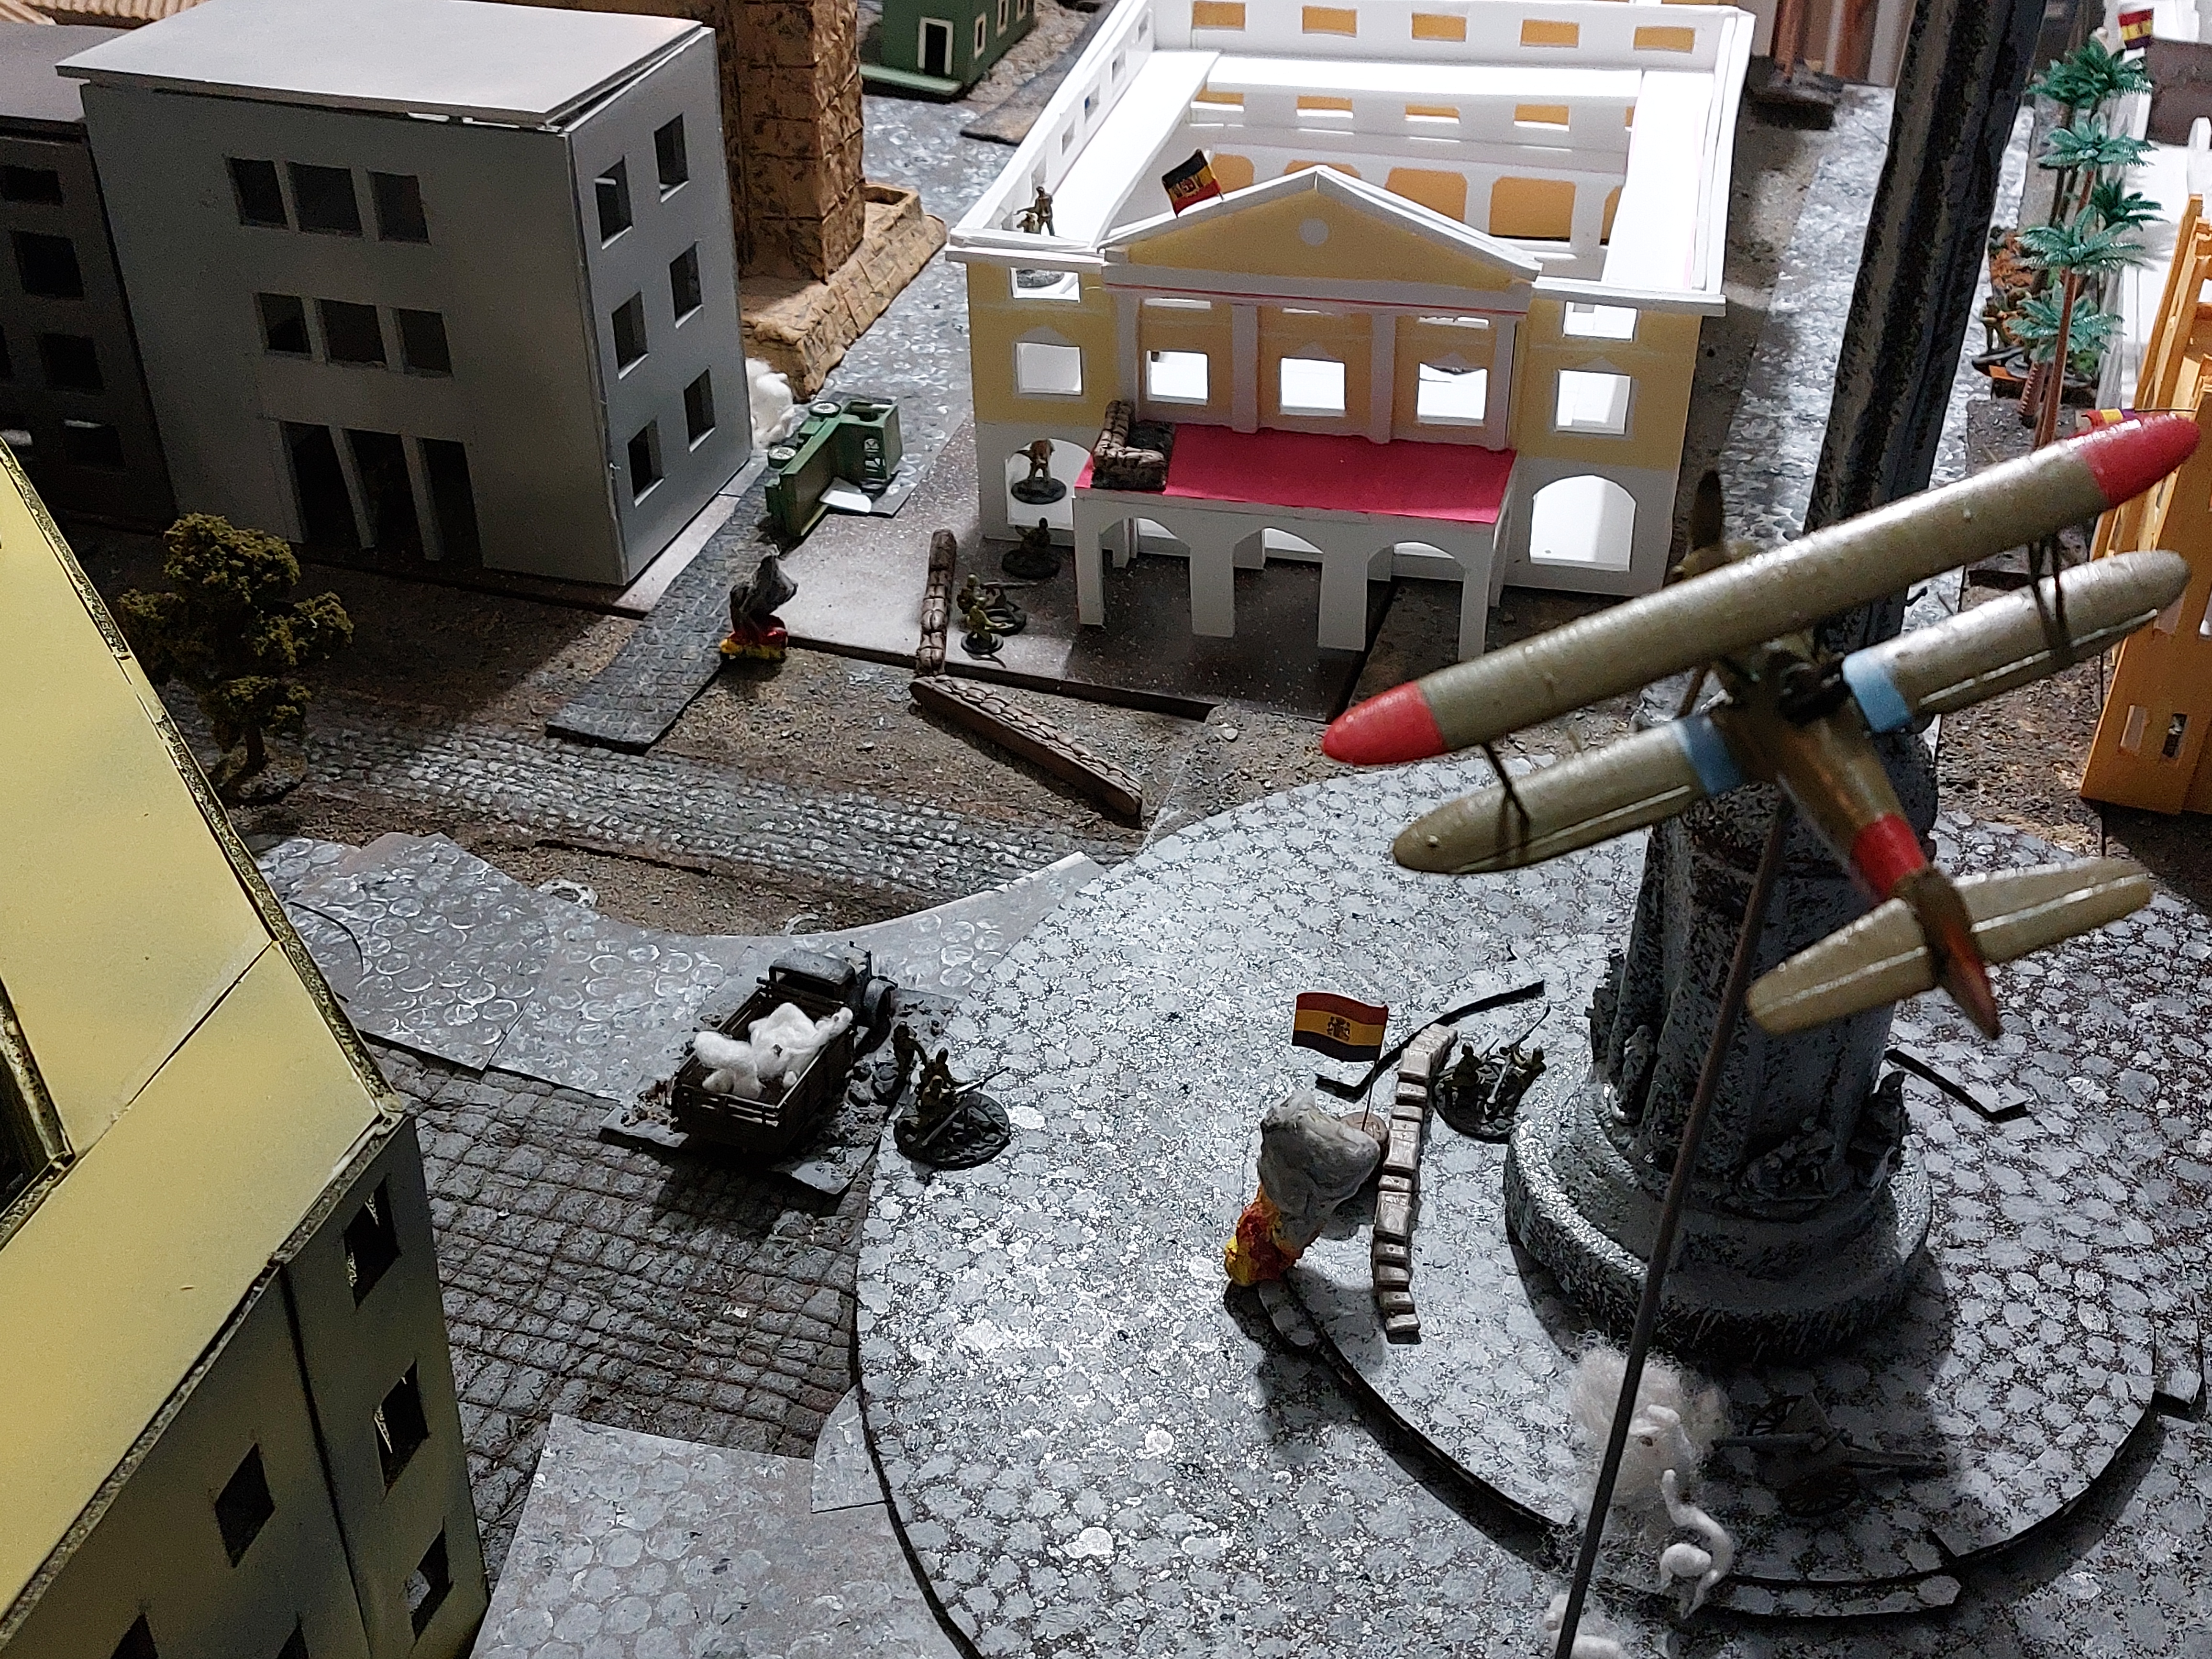
John leveled his cannon at the Nationalist artillery piece next to the Columbus statue. The shell landed directly beside the cannon, killing the crew and causing 4 damage points to the piece and to the statue.
With one cannon down, I aimed our other 75mm at the second nationalist cannon. This was our lucky morning, it appeared, as I also scored a direct hit. The blast killed five artillery crewmen and support, and pinned a sixth. It also caused four damage points to the cannon. If your keeping track, John and I just rolled 4's 4 times in a row. Could our dice luck hold out?
Chris was very active during the movement phase. He ran some soldiers over to the first cannon to try to get it firing again.
Chris continued his efforts to remove all ammunition and supplies from the cache in the long building by the water, preferring to keep his stash in the Dependencia Militar, which he was better prepared to defend.
He sent a soldier into the truck in the Ronda that wasn't already destroyed. Chris loves trucks, he always tries to find the tactical advantage of whatever vehicles end up on his side of the table.
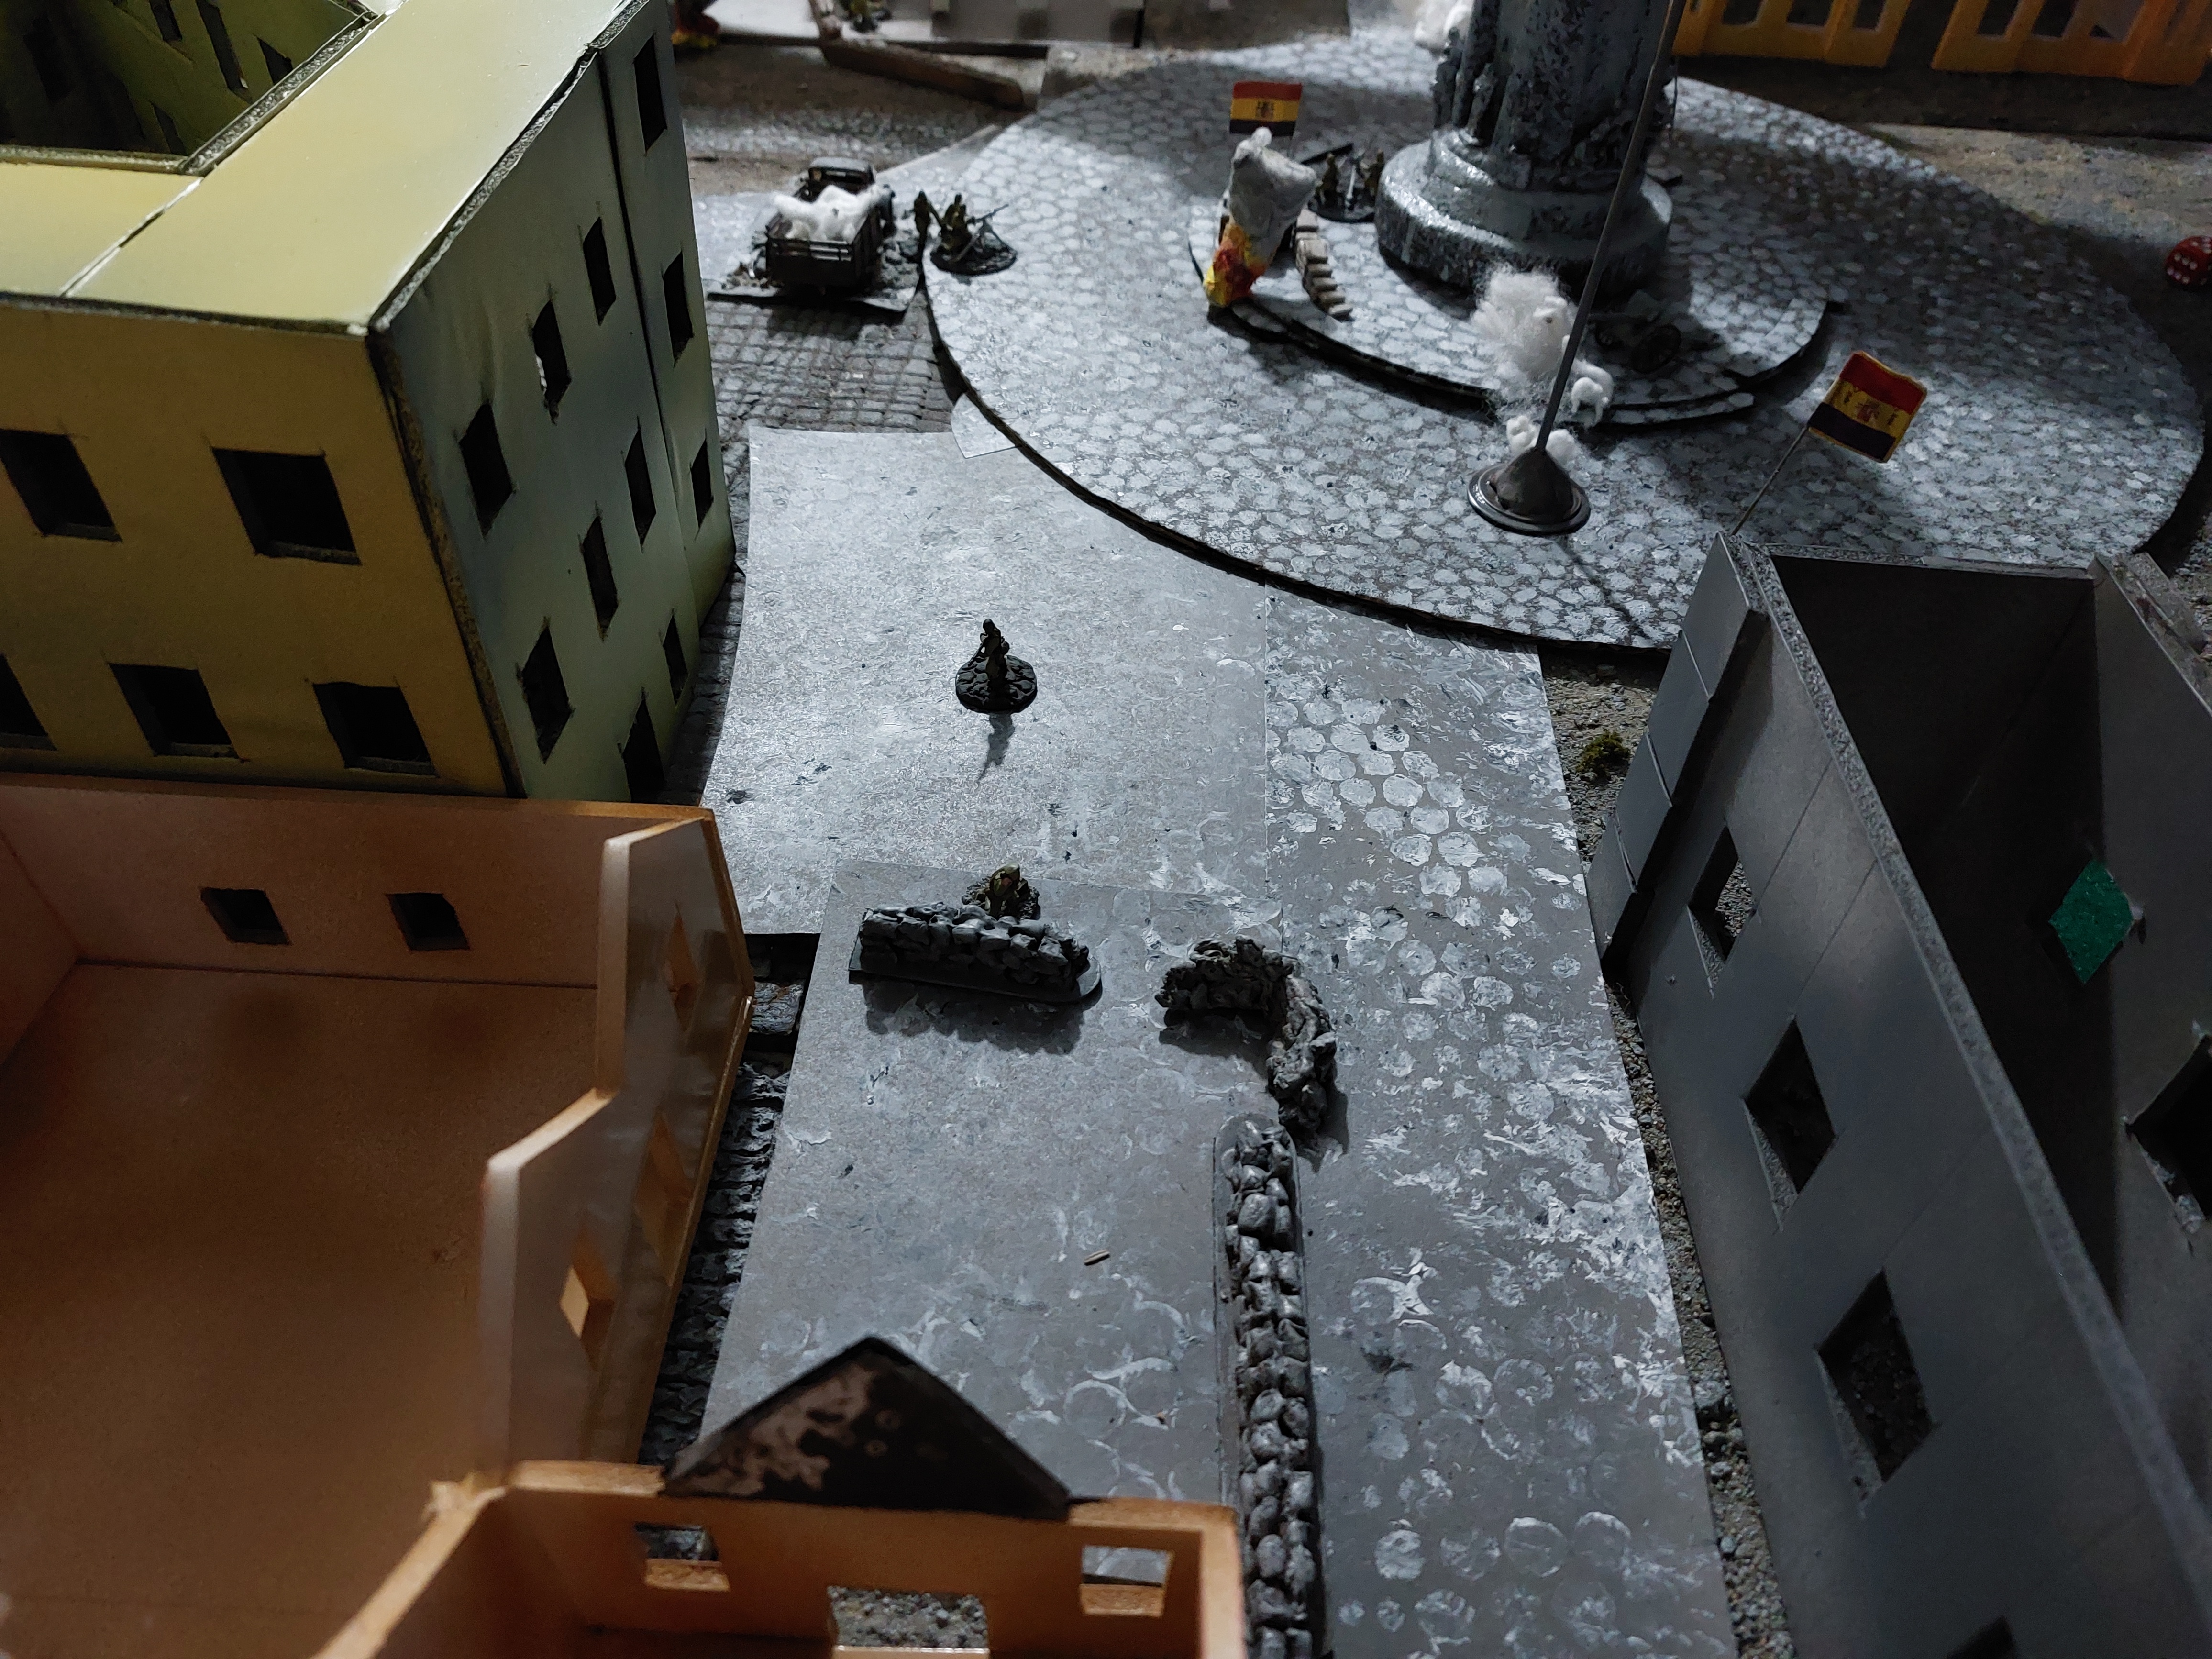
In the Atarazanas, Chris began moving his soldiers off of the roof and upper floors. He left the spotter in the pill box, but continued to, what it seemed to us, move toward evacuating the Atarazanas. He did advance 4 sappers into the gray building across the street, which can be seen on the right-hand side of the photo below. The sappers covered the three front doors and the rear door.
In the courtyard in the Atarazanas, the fleeing soldiers passed a grenader, who was headed out the back door with haste. The MG crew carried their weapon out the back door and over to the smoking ruins of a truck in the Ronda. Not completely abandoning the building, however, Chris sent six soldiers into the contested room of the Atarazanas.
In the Capitancia, Chris kept the windows on the north flank well-covered. In the rest of the building, he brought soldiers down off the top floors. General Goded and his staff evacuated the Capitancia, and headed next door to the Dependencia Militar, where Chris was busy stockpiling ammunition and preparing for a long siege.
When it was our turn for the movement phase, John charged toward the green house but ran into Overwatch. Chris had a soldier in front of the house and a few on the street behind it, as well as a handful of soldiers in the windows of the Capitancia. With their crappy morale, however, Chris's soldiers were unable to land a single shot.
Undaunted, John continued the charge toward the Green House, streaming along both sides of the thin stucco house. Workers surrounded the soldier standing in front of the Green House.
On our right flank, I moved workers to the doorway of the Atarazanas, and more along the south side of the building to use the windows and support the comrades inside.
With Movement Phase over, it was time for the Skirmish Phase. Chris called to skirmish in the Atarazanas first, and he won the roll. He fired on my workers with his two un-pinned soldiers in the front room. They each killed a worker.
My workers fired a volley through the windows and doors and into the Atarazanas, killing the two soldiers who had fired on me. We each had a pinned combatant in the room, and support nearby (outside for me, in the taller building for Chris).

On the other flank, Chris won the skirmish roll as well. He had two soldiers to fire who hadn't already during Overwatch. Both soldiers missed, again. John responded, killing the two soldiers standing outside the Green House.
Next, Chris's HMG opened up, but landed no hits. Nighttime visibility affected the skirmishes. Two sappers standing near the MG also missed their shots.
John's workers behind the barricade up the road a bit fired at the flashes from the MG and its supporters. All five workers missed their shots as well, exemplifying the phrase "shots in the dark."

Round Four began with Chris winning the Round Initiative roll, again. Chris has no ranged weapons to fire, as we had taken his cannons out of commission. He chose to hold his MG behind the blue car back for overwatch, to discourage John from making and rash dashes forward.
John and I, our artillery ammo running low, decided to conserve our shells for the round. John fired his MG installed near the tavern at the soldiers and MG behind the blue car, but missed.
Chris's first action during the Movement Phase was to hurry his grenader out the back door of the Atarazanas office building and into the back door of the Atarazanas room with the massive ammo cache.
Chris supported his grenader by moving four soldiers up into the windows looking from the office building into the lower section of the Atarazanas. Outside the office building in the Ronda, Chris's soldier in the working pickup truck pulled forward toward the Capitanica.
On the other side of the table, Chris moved his LMG soldier from behind the Green House and into the front door of the Capitancia. He also continued transferring the ammo and supplies from the long building by the water into the Dependencia Militar.
Next, it was our turn to move. John loaded some workers into the truck he had used to bring up his MG. He also stormed into the Green House, covering its windows directly facing the Capitancia. On the back corner of the table, which was supposed to be the south-western edge, where Chris's reinforcements would arrive at Round 10, John set some workers to the task of barricading the road.
I sent workers from the grey buildings and streets to charge into the Atarazanas. Chris's soldiers on overwatch managed to kill two workers, but could not stem the tide. The anarchists surrounded the lone soldiers left pinned in the front room, and pressed up against the doors and windows to the other rooms of the building.
I sent more workers in behind them. Outside the Atarazanas, the militants continued along the south edge of the building, covering the doors and windows. They could see Chris's grenader moving dangerously close to the ammo cache, which our forces desperately needed to keep our rifles and cannons firing. As per the scenario, each of our units began with only 5 ammo points, and our advanced groups were already running low now that it was the 4th Round. Who would fire first?
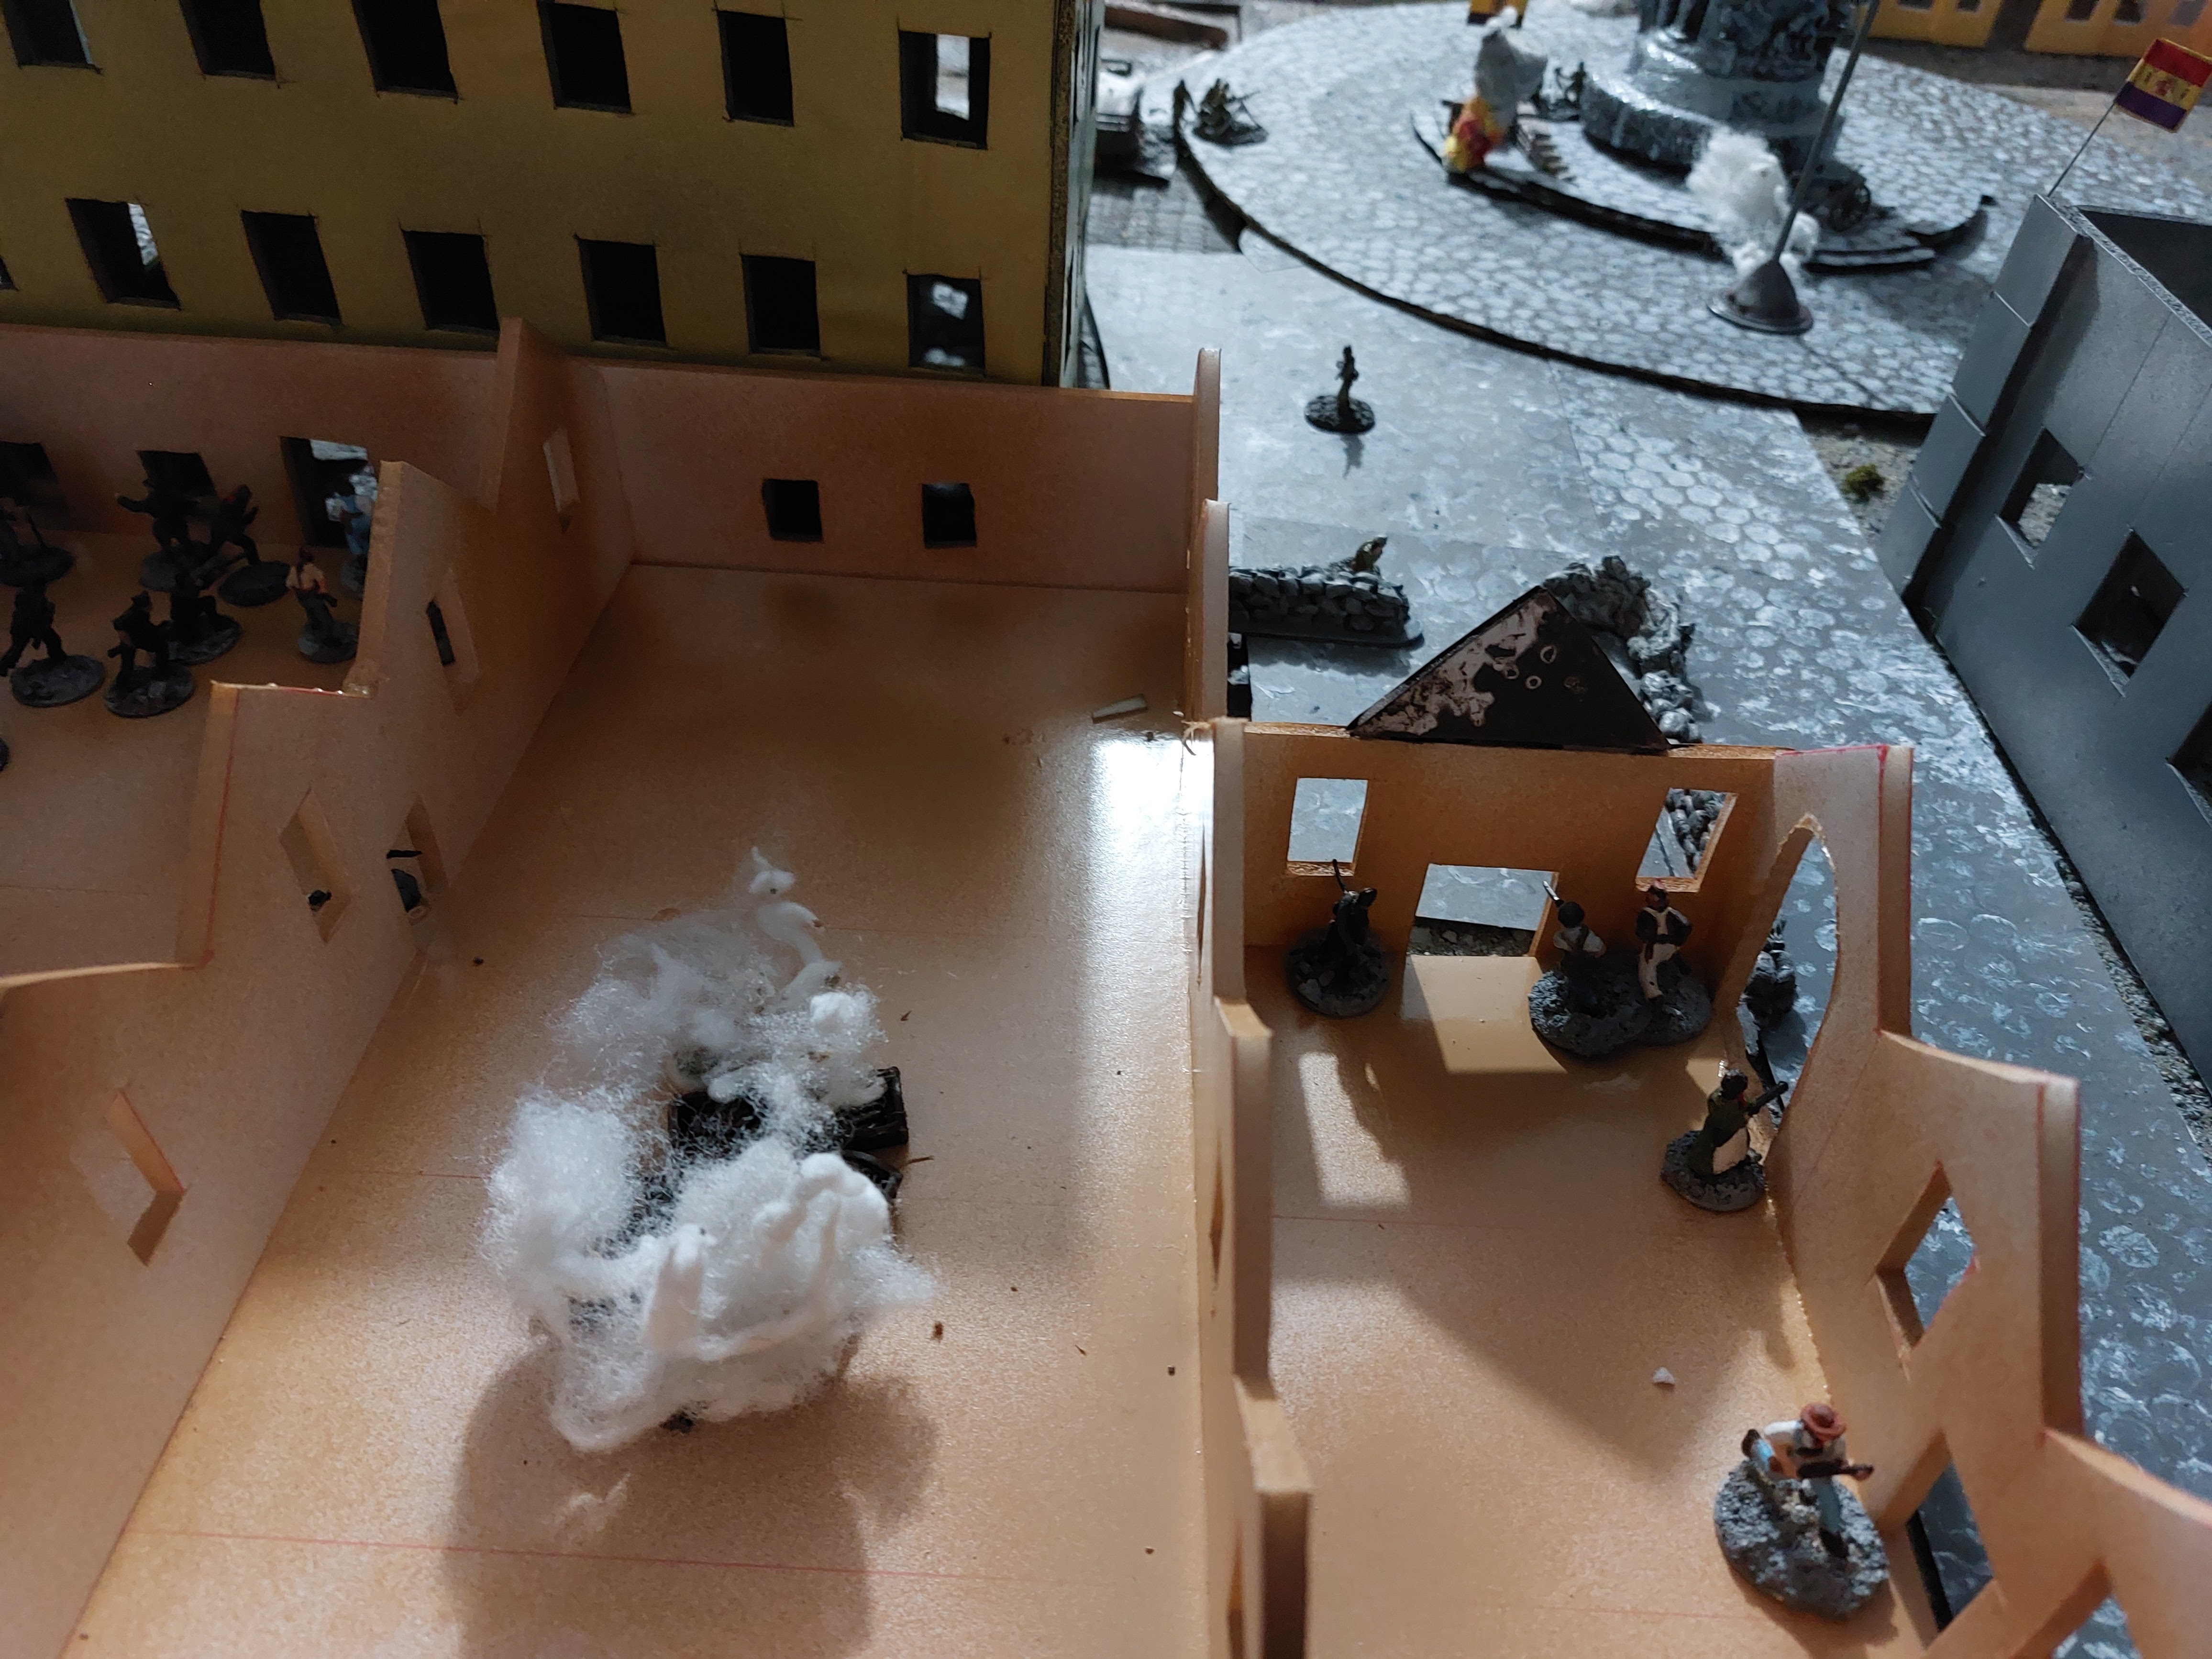
Chris, as he had done all day, won the head-to-head roll and thus the skirmish area. His first order of business was the ammo dump. The grenader tossed his explosive at the pile.
With a perfect 4, Chris obliterated the cache. The explosion caused 9 damage points to the building, and left our workers without the supplies they so badly needed. Chris's soldiers in the internal windows tried to fire across the room at my workers in the outside windows, but landed no hits. When it was my turn to respond, my workers mowed down that damn grenader. In the front room, the workers executed the surrounded soldier, who refused to surrender, and fired harmlessly at the soldiers on the other side of the windows.
Chris called next to skirmish in front of the Capitancia. You guessed it, he won the roll. His soldiers in the Capitancia fired into the windows of the Green Building, but they could not find their targets. Next, the HMG behind the blue car fired into the Green House. This time, Chris had more success, killing two workers in the house. A soldier in the big window of the Capitancia fired an SMG into the Green House as well, suppressing one of the workers there.
When it was his turn to respond, John fired his workers in the Green House at the HMG crew behind the blue car. He managed to kill the two gunners handling the weapon.
Then, he tried to have a worker toss a homemade projectile at the blue car.
He rolled a 1. The bomb detonated in the worker's hand and he went up in a puff of smoke.
Luckily, the grenader was advanced enough that the mishap caused no other immediate casualties, but it did pin the two workers directly behind, who were now caught in the open with the sun rising quickly.
During the Regroupment Phase, John moved most of his attack group who were not already inside the Green House, to the south side of that stucco house.
The sun rose at the opening of Round 5, illuminating the carnage and destruction on the battle field that was Barcelona. Visibility went from 10" to 40", or with binoculars from 25" to 60".
Chris won the Round Initiative roll. In the previous round, he had managed to get one of his two damaged cannons back into action. He aimed it at our MG crew on top of Casa Juan's. It sailed 6" too far, landing on the roof of the Metal and Transit Workers Union Headquarters, causing minor damage to the building. The workers inside were unharmed.
We responded with our own artillery barrage. John fired again on the cannon next to the Columbus Statue, hitting it with yet another perfect shot.
The explosion killed the crew again and damaged the gun further, but not irreparably, as 4 health points remained.
I fired my cannon at the MG crew set up behind sandbags in front of the Dependencia Militar. The round landed short, sparing the crew but leaving them pinned and causing 5 damage points to the barricade, the gray building across the street, and the truck. As the truck only had 4 damage points left the give, it was destroyed and the soldier driving it was killed.
John tried to fire his MG at the nationalist MG behind the blue car but he rolled a 1, and thus took no action.
Just then, the combatants looked up to the sky to see the return of a Republican airplane!
It had spent the previous afternoon bombing the area, but had retired at nightfall due to poor visibility. Now that the sun was up, the plane entered the battle.
After lecturing my friends on how delicate the model plane was, I promptly toppled it over with my elbow. It fell onto the floor, knocking the top wing off and breaking the propellor. After a little glue and a little more rum, our plane was back in action.
It dropped its first bomb of the day. The explosive landed 6" ahead of the base of the flight stand.
The bomb landed in the Ronda, between the two MG crews in front of the statue. While it created no casualties, it suppressed both MG crews and caused 1 measly damage point to the sandbag barricade, which was clearly well-made.
Next, the Movement Phase began. Chris continued hauling ammo into the Dependencia.
Next, he moved a few more soldiers down to the ground floor of the Dependencia. Then, he had a couple soldiers rush out the back door of the Atarazanas.
The two soldiers there, hoping to slow down the workers' advance threatening to turn the corner on the south flank via the Atarazanas.
During our movement turn, I brought more anarchists into the Atarazanas, supporting the engaged group on the front line with workers behind them.
Workers covered the windows and doors of the eastern-most room of the Atarazanas, setting up a shootout with the soldiers outside. Half of the Atarazanas was now in the workers' hands.
On the north flank, John moved more militants into the Green House and covered all of the windows and doors with riflemen. Outside the stucco house, he ran a second grenader up to the front.
Behind the grenader, two workers remained pinned and more were out in the open, illuminated to their enemies by the rising sun.
Behind the action, John's truck carrying armed workers rumbled toward the center of the front line, then turned down the ally behind the Metal and Transit Workers building.
The Skirmish Phase began. Chris called to skirmish in the front room of the Atarazanas. He won the roll, and killed one of my workers. I responded with a pistol, killing one of the soldiers at close range.
Next, Chris called to skirmish between the Green House and the Capitanica. Chris won the roll again! His soldiers in the Capitancia took aim at the grenader just across the street. Six soldiers fired and missed. He tried again with two more from the Dependencia building. This time, the worker's luck ran out, and the grenader was shot dead on the street.
Now, John could return fire. Workers in the Green House gunned down the two soldiers sent to replace the dead MG crew behind the blue car. He shot a third soldier who had taken cover by the corner of the church.
Finally, we readied to settle the last skirmish zone: the south side of the Atarazanas. Chris and I rolled head to head, and for the first time that day, I won the roll!
The militant workers in the back room killed both soldiers in the street.
During the Regroupment Phase, Chris pulled almost all of the remaining soldiers in the Atarazanas to the back door. They seemed poised to make a run for it in a future round, abandoning the spotter on the roof.
On the other side of the table, Chris made sure soldiers covered all of the windows and doors of the Capitancia and Dependencia buildings.
His forces outside of and advanced from those buildings now consisted only of the four soldiers covering the doors of the gray building on the corner of the Ramblas, and three soldiers with the HMG behind the blue car.
Facing off against the mutinous nationalist soldiers in the palaces, John's workers took cover in the green and stucco houses, and covered the street running west with layers of barricades.
At the back end of the table, workers still covered the barricades around the Plaza of the Theater, and both of our cannons were operational, if running low on rounds.
In the southwest corner, John's workers finished their barricade, and were ready for Chris's reinforcements due to show up in trucks 5 turns later.
My workers in the Atarazanas watched the soldiers move toward the back door.
Outside, the airplane had many good targets to choose from for the coming rounds.
Here's an overview of the battlefield at the close of the first five rounds.
Chris did a great job slowing down our advance, given his low morale and poor shooting. Winning all but one initiative roll certainly helped. The front line hardly changed, though John and I made some progress toward our objectives. I'll hold off on my analysis pending further rounds, but I will say we had a good time playing for a few hours on a Sunday morning. The rum was a fun, if dangerous, addition to our routine.
We had a couple of thoughts regarding rule changes, including stipulations around artillery shells and buildings' "shadows." In particular, we thought artillery should only be able to fire over a building if it is positioned at least as far from the base of the building as the building is tall. Shells landing behind buildings should follow a similar rule. Perhaps, shells landing less than half the distance of the height of the building would instead hit the corner of said building, as the building provides a "shadow" of cover behind and below. We will have to do more thinking on this. Finally, we pondered if artillery shells should do more damage than the roll of 1 D6. Perhaps we should double the roll to 2 D6. It seemed a little silly that we hit the same 75mm cannon twice with artillery shells, killing 2 separate crews, yet the gun is still operational.
We shall revisit these rule ideas, and come back together soon for the 3rd day and 6th Round of the game. Check back for the report!


Looks like you had fun! Could you add some info about the figures and gear used - looks like Irregular and Minairons figures, but I did spot sone HäT WW1 British Infantry? The column is a spectacular piece of scenery! Regards, Pat
ReplyDeleteHello Pat and sorry for the late reply! I'm glad you like my Column, unfortunately I failed to destroy it with cannons before capturing that area (as you will see in my latest post), so unless the nationalists hit us with some explosives I won't get to put the destroyed version of the column on the table. Maybe next time! As for figures used, yes good eye. My favorites are the Minairons, but as they're expensive for us to get here in the states I don't have many on the table. Most of those end up in dioramas. I do have a bunch of Irregular, as well as. Most of the rest, however, are plastic pieces, some heavily converted. Probably most are BUM, with some Ceasars WWII underground resistance figures, and the Nationalists have a lot of WWI British and converted WWII German. My "sappers" are actually figured from the board game "Attack". It's such a hodge podge it's tough to keep track. Thanks for your interest and your comment.
ReplyDeleteWell until 2015 you had an excellent source of SCW figures in the U.S., maybe you can find HPC miniatures (= Bandera = Hotspur) 2nd hand. See some alternatives here: https://toofatlardies.co.uk/forum/viewtopic.php?t=13082 Panzergarage have a small but growing selection of figures too, again made in Spain though. Regards, Pat
ReplyDeleteForgot to mention, Imex produce a set of Korean infantry sone of which don't even need weapons swapped to double as Republican people's army. http://plasticsoldierreview.com/Review.aspx?id=810 I also used Caesar (and Imex) Chinese: http://plasticsoldierreview.com/Review.aspx?id=1303 Have fun! Pat
ReplyDeleteI was trying to remember the name Bandera. Yes I ordered from that range once, a few years ago, from RH models who picked up the range. http://www.rhmodels.com/16.html They're also in the UK, but have really nice, very specific pieces. I purchased from them a handful of armed workers that made it onto this particular table, mixed in with the rest. Bandera also has a "Durruti Column" set that I have and will make it out later in the campaign. Mike O pointed out that Imex North Korean Infantry set as well, with the hats instead of helmets, which were easily converted to serve as Durruti Column pieces too. I've never gotten anything from Panzergarage but they sure look great on their site. I've scratchbuilt a bunch of armored pieces, which will likewise make it out later in the campaign, including a 3D print I designed of "King Kong". Thanks again, Pat, for checking in and discussing here, I hope to hear from you again.
ReplyDelete